About Me

My photo
I make toys for kids who don't want to grow up. I'm on the lookout for new projects. If you're interested in commissioning me to build something ridiculous, shoot me an email.

Thursday, January 31, 2013

Recent UFO Sightings in the Workshop

I've been busy as hell getting things ready for the upcoming Hobby Expo on February 9th at the Petaluma Community Center.  With all of the goings-on, I haven't been writing as much as I'd like, but I still want to share some of what I've been up to.

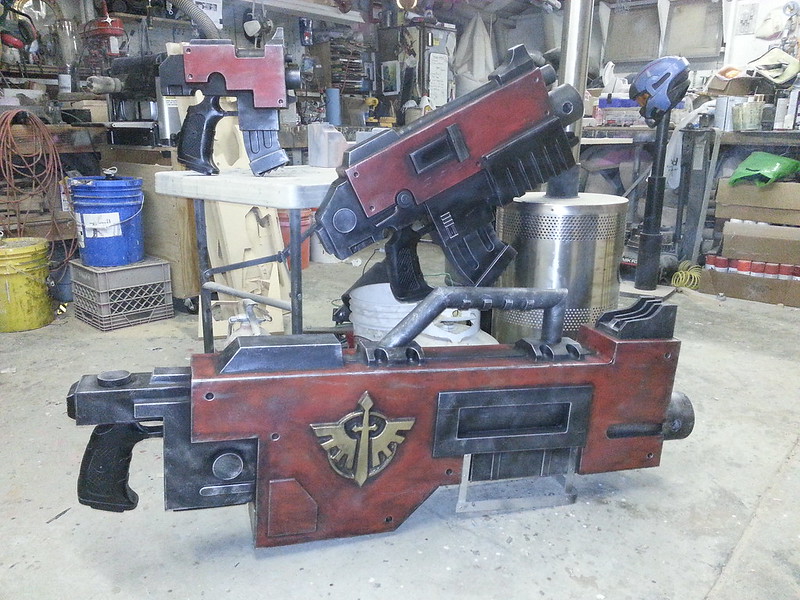
First, I'm almost finished making a handful of STA-52 Light Assault Rifles from the Killzone series.  Here's the stack of raw castings:
Helghast Rifle Casting Lineup

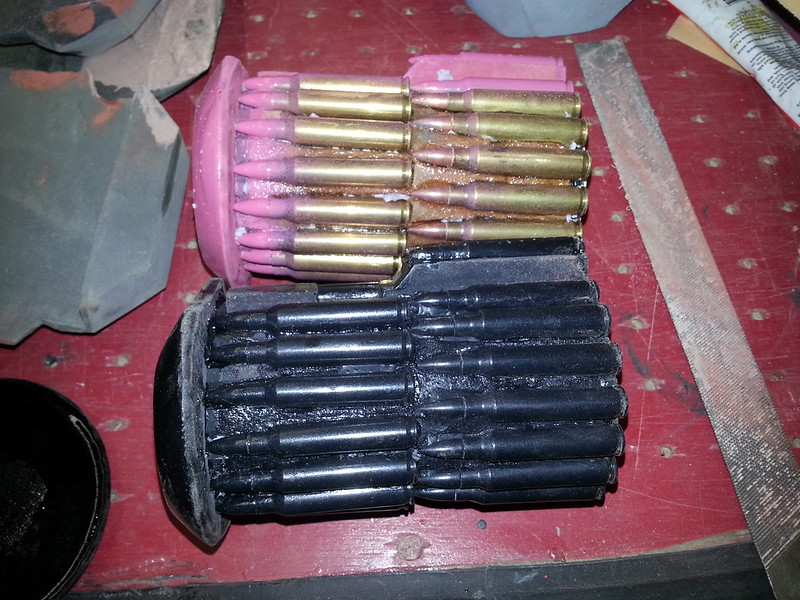
That odd gap in the buttstock?  That's where the two-tier drum magazine goes:
Untitled

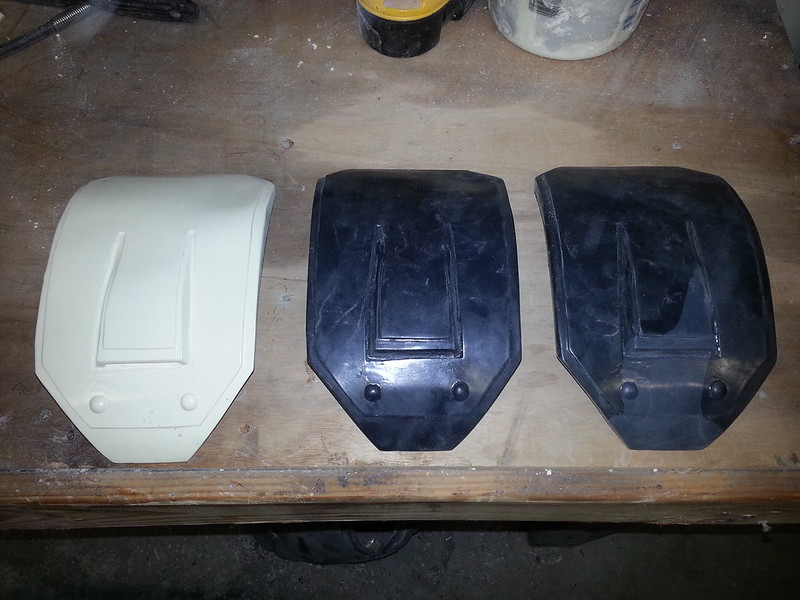
While I'd originally intended to just make the rifle as a display piece, I'm starting to really like the look of the Helghan troops.  With that in mind, I'm at least making the helmet if not the whole outfit:
Untitled

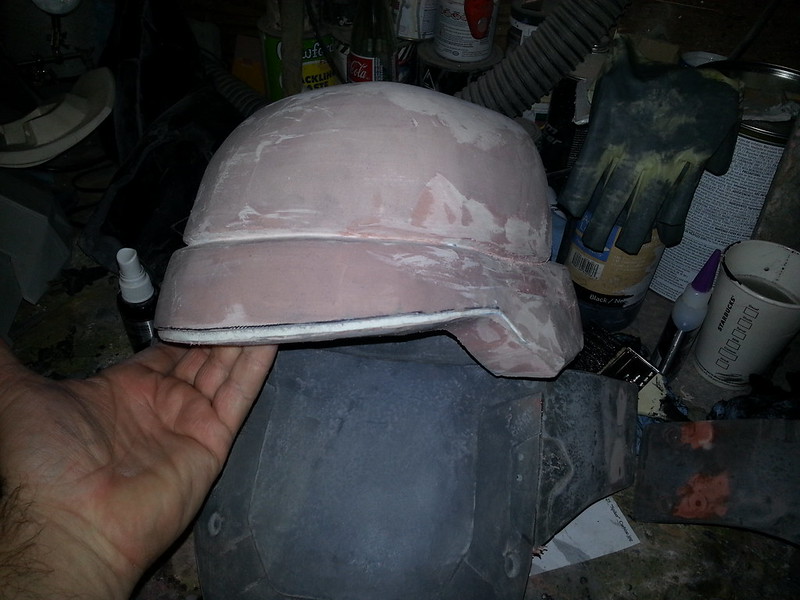
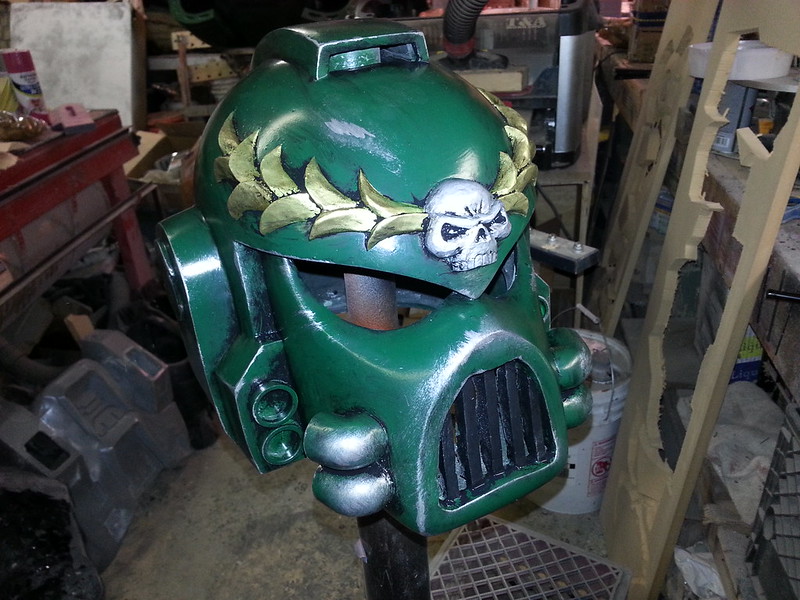
Speaking of helmets, I've started working on another Space Marine suit with more trim and badges than any of the other ones I've already built.  Here's the first part:


Untitled  
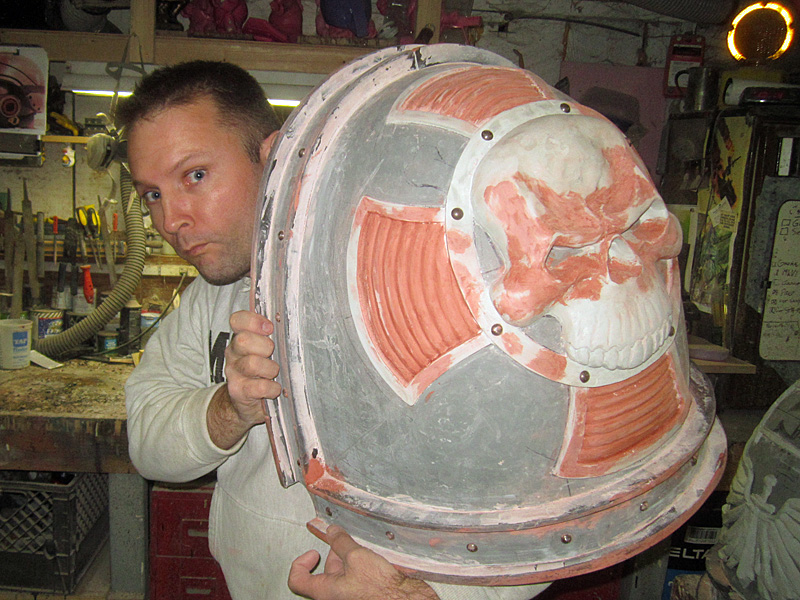
Here's the left shoulder nearly finished:
Left Shoulder Sculpt Nearly Done

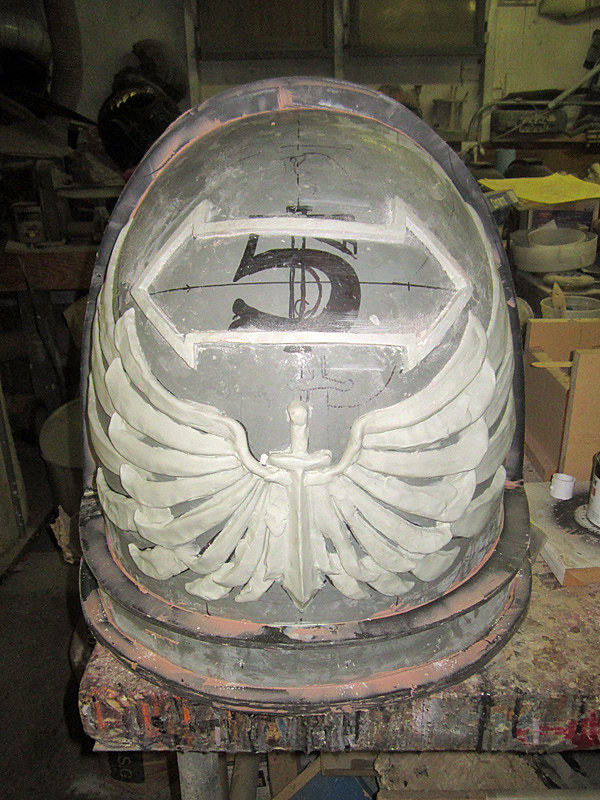
The right shoulder still has a long way to go:
Right Shoulder in Progress

While this suit will probably be armed with a bolt pistol and/or bolter, I've also decided it'd be really cool if I can make him a power sword and a combat knife.  Here's the forming bucks in progress:
SM Blade Form

Also on the 40k front, since I was never happy with my Imperial Guard costumes, I've put some time into making them a little more involved.  Here's some of the new parts added to the web gear:
IG Web Gear

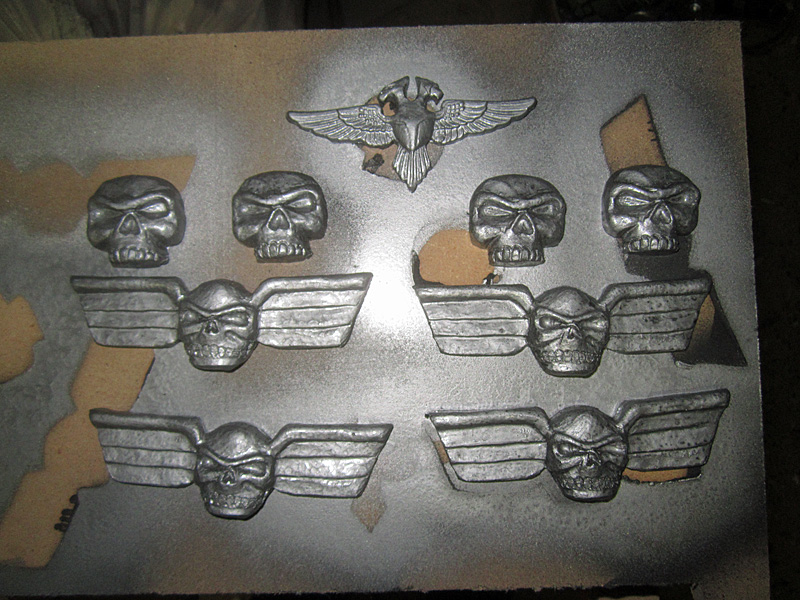
Here's a few badges I've sculpted, molded, casted, and painted:
IG Emblems

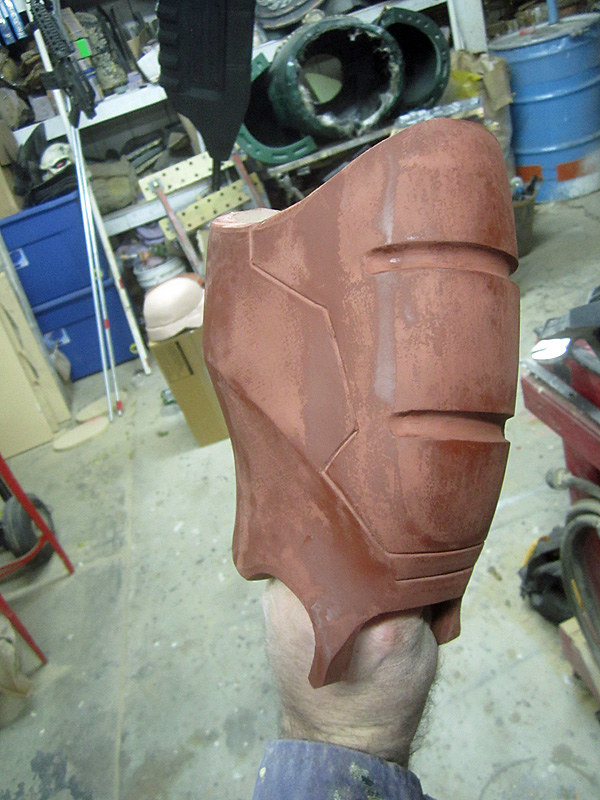
Since I never seem to be able to stop making HALO stuff, I'm still working on my Agent Maine costume.  Here's the right shoulder out of the mold before prep work was finished:
EVA Shoulder

Here's the left shoulder and a couple of raw copies just in case:
CQB Shoulder Plates

On the backburner, I'm still making slow progress on my "all digital" Ironman costume build.  I'm making all of the pieces on my Objet 3D printer and my Carvewright CNC machine.  Here's the CNC'ed bicep almost smoothed out enough to mold:
Bicep Smoothing

It looks pretty good considering the way the pieces look when the come out of the machine.  For example, here's one-third of the chest:
IM Smaller Chest

Finally, I've made a lot of progress on my latest Combat Garden Gnome.  Behold...  the Bayonet Gnome:
bayonet gnome progress
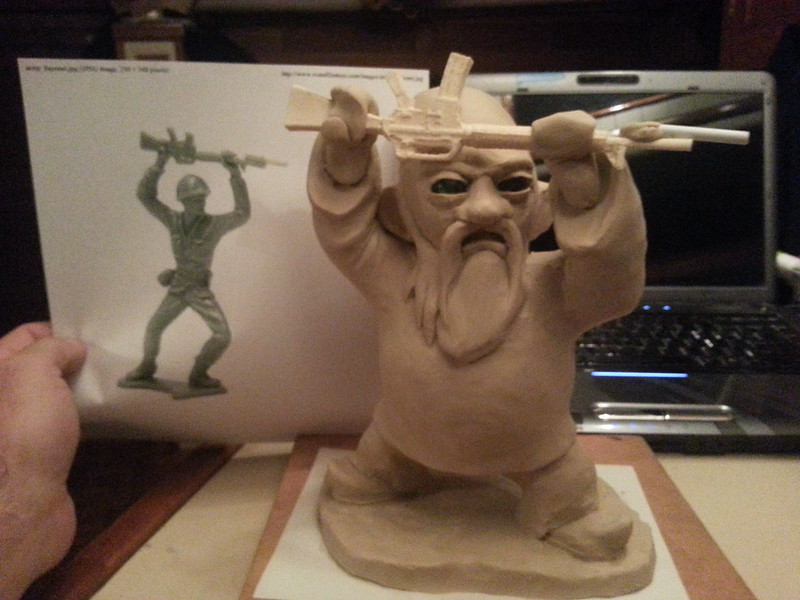
He's still got a way's to go, but I'm happy with the sculpt so far.

 So that's the bulk of what I've got in progress right now (that I'm allowed to talk about).  Huge progress will unfold in the next couple of weeks, so be sure to subscribe so you don't miss any updates.


Tuesday, January 15, 2013

Touring Rancho Obi-Wan

Yesterday I was invited to join friend Fon Davis of Fonco Creative for a tour of Rancho Obi Wan, Steve Sansweet's museum where he houses the world's largest collection of Star Wars memorabilia.  I'll admit that I was initially skeptical about going and looking at a barn full of old Star Wars toys.  It turns out I had no idea what I was in for.

Steve Sansweet worked as the Director of Content Management and Head of Fan Relations for Lucasfilm for decades and is a fiendishly dedicated collector of all things Star Wars.  He literally wrote the book on Star Wars collectibles.   

Seriously, several books.  Their titles include Star Wars: 1,000 Collectibles: Memorabilia and Stories from a Galaxy Far, Far Away, Star Wars: The Ultimate Action Figure Collection, The Star Wars Vault: Thirty Years of Treasures from the Lucasfilm Archives, Star Wars - From Concept to Screen to Collectible, and The Complete Star Wars Encyclopedia.

His museum, a densely-packed 9,000 square feet, is filled to the brim with everything I ever wanted as a kid plus a whole lot more I grew to covet after I started earning my own paychecks.  The collection includes vintage toys, screen-used props, tie-in merchandise, tribute artwork, and some amazing prop and model replicas.

Here's one of my favorite pieces, the smiling Vader:
Smiley Vader

There's a whole lot more, so if you'd like to see additional pictures, read on...


Friday, January 4, 2013

Warhammer 40,000 Space Marine Build Part 8: Guns Guns GUNS!!

It's been a while since I've written about this project.  If you're only just joining in and you'd like to see the other parts, here's the rest:
 Part 1: an Overview
Part 2: the Backpack
Part 3: the Boots
Part 4: the Rubber Bits
Part 5: the Helmets
Part 6: the Hands
Part 7: Badges and Trim

The next thing was to make the armament for these massive warrior gods:
Boltgun Family Portrait

For details on how they were built, read on...


Tuesday, January 1, 2013

Jen in Carbonite


A while back a friend of mine asked me if I could help him build a replica of Han Solo encased in carbonite to hang on the wall in his basement bar (which he'd themed to look like the throne room of Jabba the Hutt).  So while I was sitting in the cafe one morning, poring over photos of the original prop, my friend Jenny wandered in and asked what I was doing.  

So I told her.

"Can you really make that?" she asks.

"Sure," says I, "it's actually not such a big deal."

"Does it have to be Han Solo?" says she.

"No," I replied, "it's actually easier if it's someone who can come into the workshop for lifecasting.  That'll save me the trouble of finding or sculpting a copy of Harrison Ford's face."

"What if it was me?" says she.

The conversation ended with her gleefully agreeing to come to the workshop and put in all of the labor and pay for all of the materials required to make the project possible.  My role was to provide parts and technical advice.       

So here's a decent photo of how she looks on any given day (shamelessly stolen from her Facebook page without permission):


Here she is encased in carbonite in my workshop:
Jenny in Carbonite Finished Right

Jenny in Carbonite Finished Left

To see how it was done, read on...