
Wearing the helmet and nothing else looks wrong. Plus, it tends to disturb the other patrons in the coffee shop I frequent. This means I absolutely had to build the rest of the RIG.
Here's the end result:

For details on how I made it (and a few better pictures), read on.
I started with the neck piece:

It was made from a piece of acrylic tube, a piece of a plywood cylinder, some PVC pipe, and oodles of scraps of sheet styrene in various thicknesses.
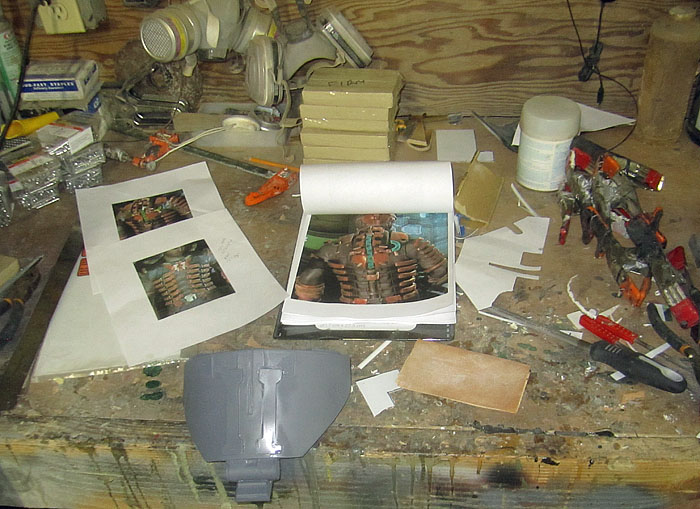
For a while I was even doing a half-decent job of keeping a neat(ish) workspace for this build:
After the neck piece was done, I made the little riblet details for the chest. They're essentially just six unique pieces repeated six times, so I only had to make one set of prototypes:
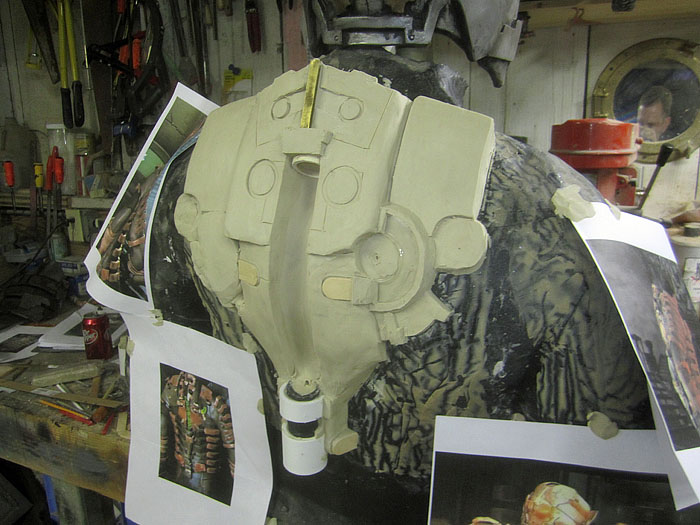
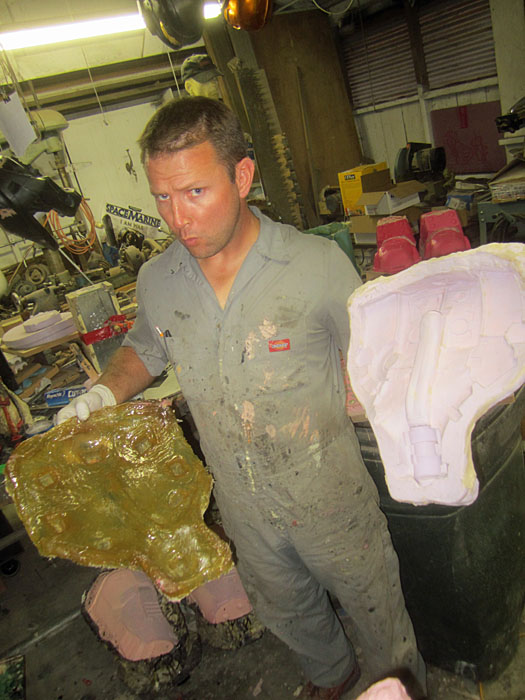
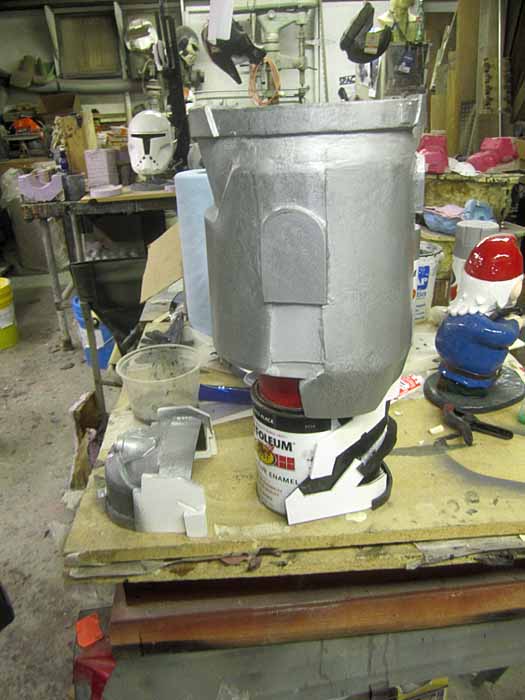
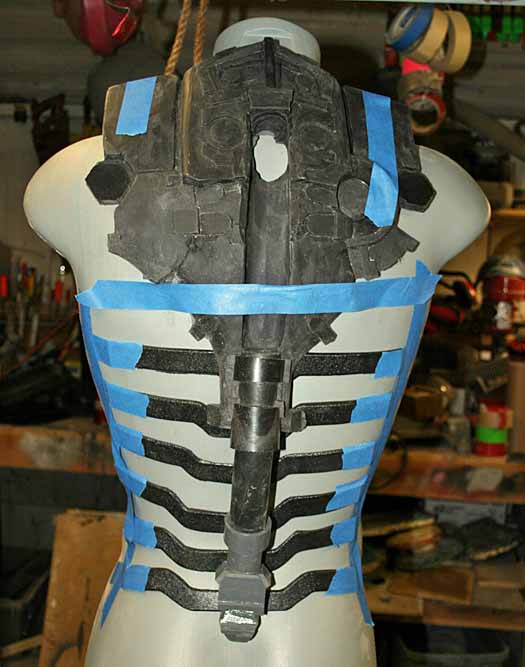
Then I sculpted the large back piece in clay with a few found items thrown in:
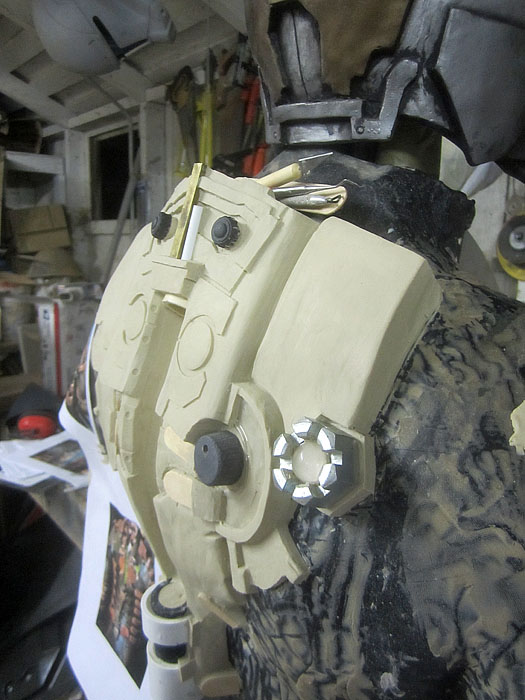
Here's the finished sculpt:
Here's the rubber jacket mold and fiberglass mothermold:
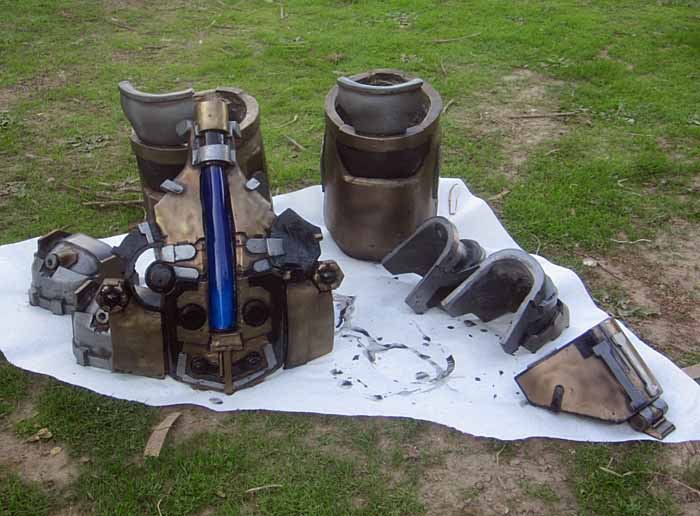
And here's the first casting out of the mold. I made the little greeblie details separate castings:
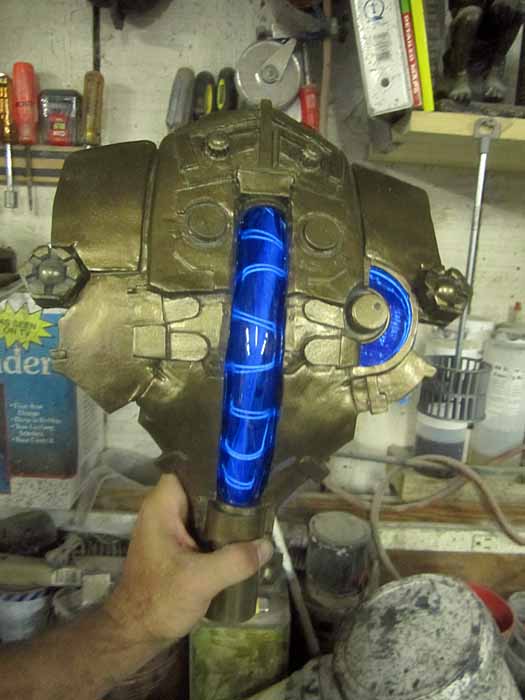
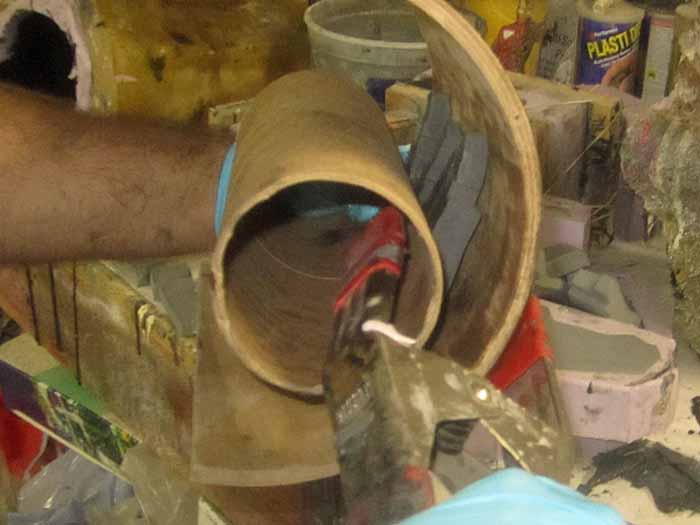
For the health tube, I cooked up a sheet of blue-tinted acrylic and bent it to fit. Here's an early lighting test using EL wire:
Here you can see the nasty mess on the inside:

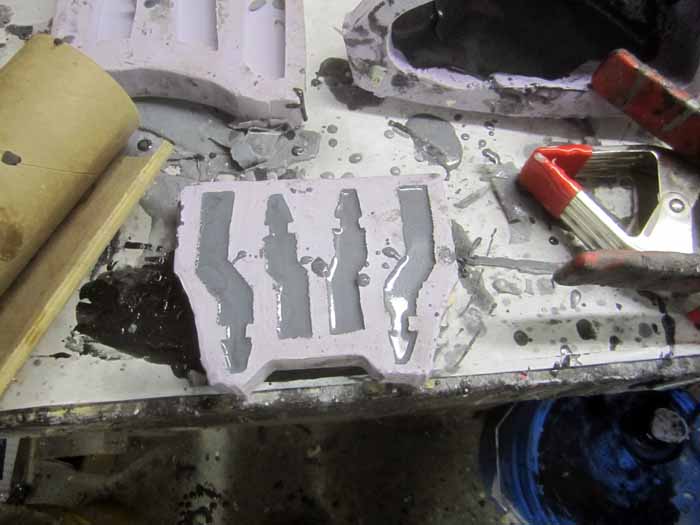
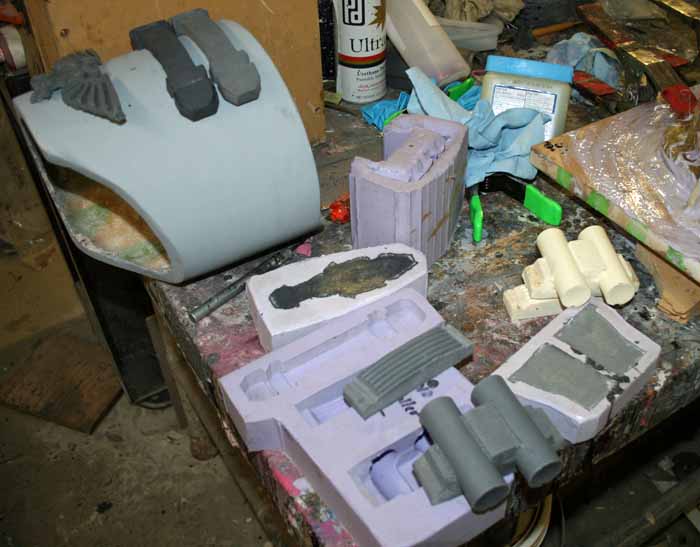
Having made a mold for the neck piece and the little riblets, I cast copies of them as well and started laying them out as they would appear on the costume:
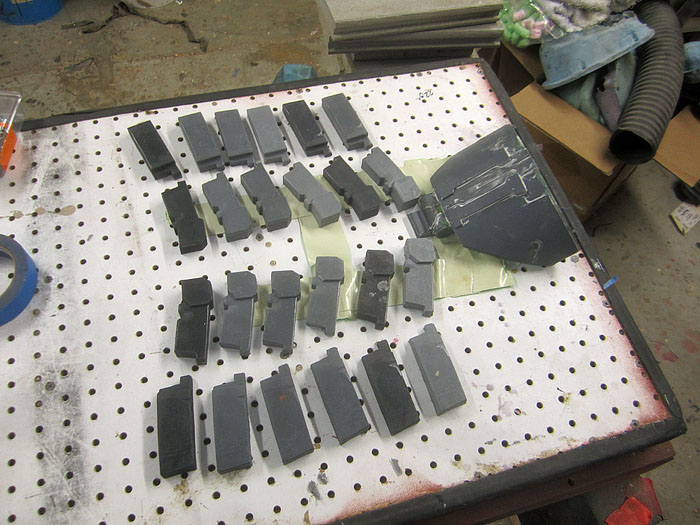
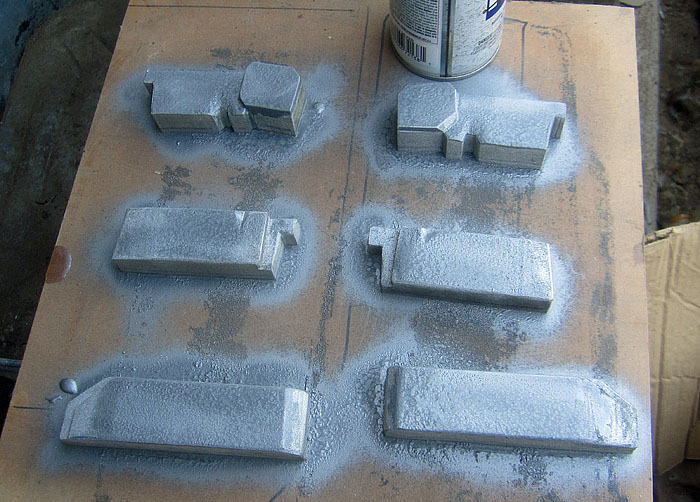
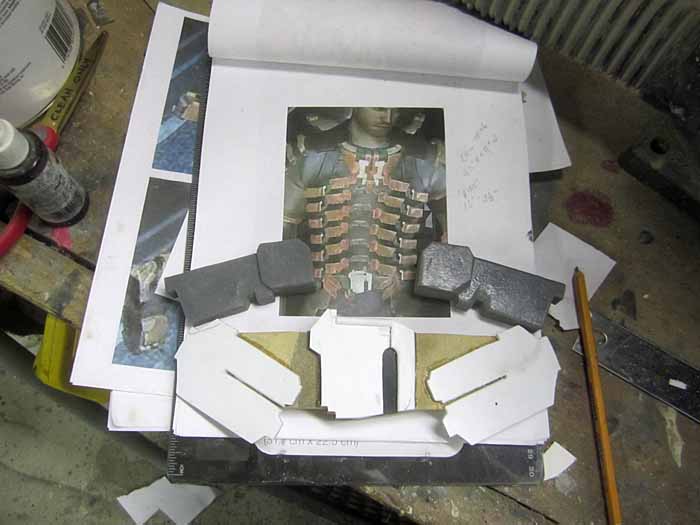
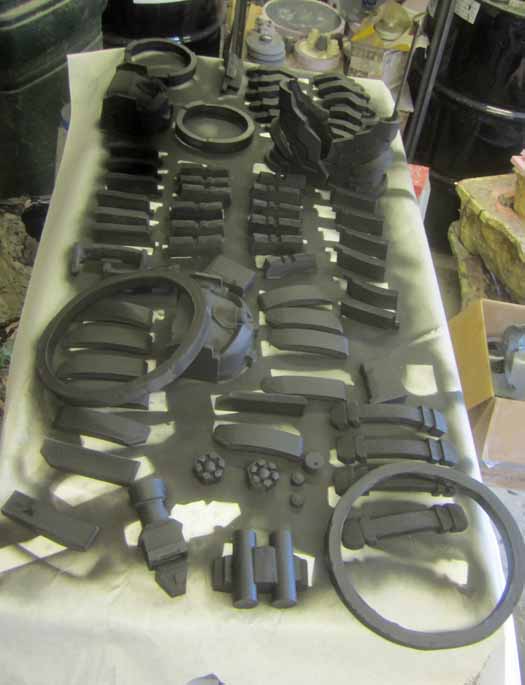
The right arm also has a series of repeating parts. After careful study, I decided I could make all twelve of the bronze colored parts out of only four unique pieces:
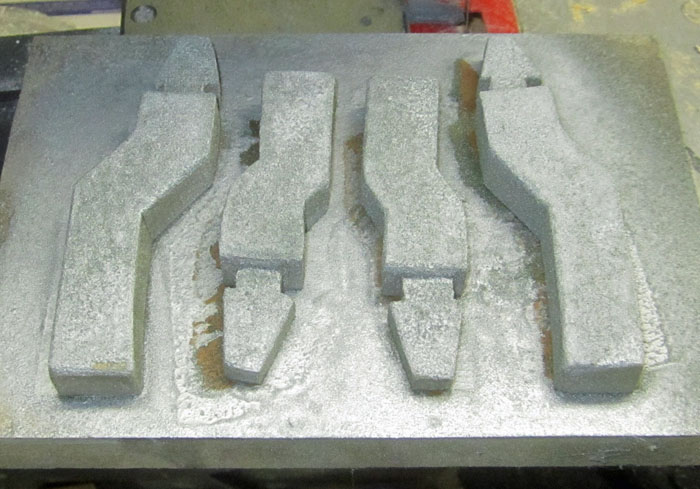
The problem is that the shoulder and chest parts all have a curve to them. Molding pieces with such a curve is a massive pain in the buttocks, so I decided to cheat a little bit and make them flat.
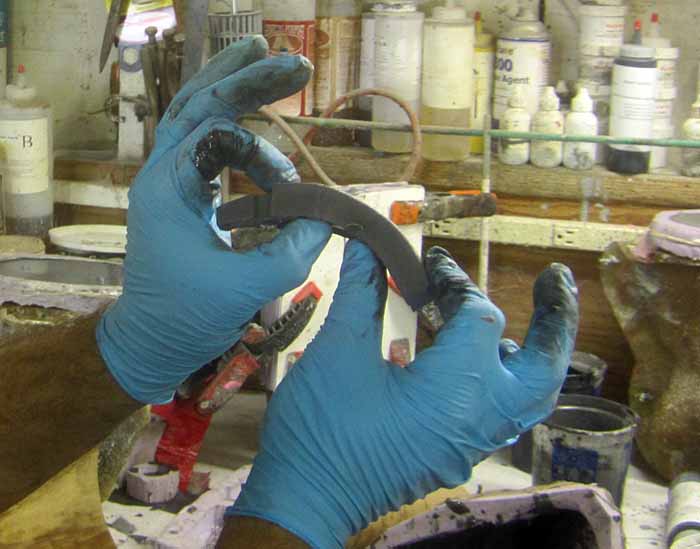
When the resin had kicked just enough to pull it out of the mold without falling apart, I pulled the pieces and bent them to the curve I needed:
Since I don't enough time (or hands) to stand around holding all of these things in the curve that I want, the next step is to lay them inside a piece of plywood cylinder I had laying around:
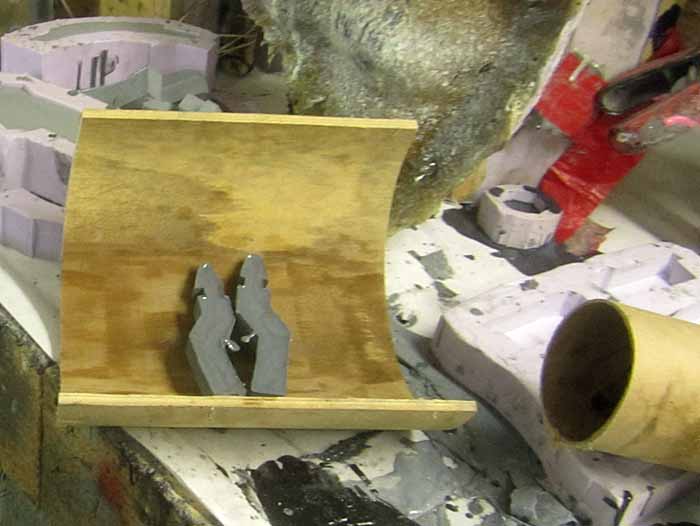
Then I clamp them in place and wait for the resin to finish curing:
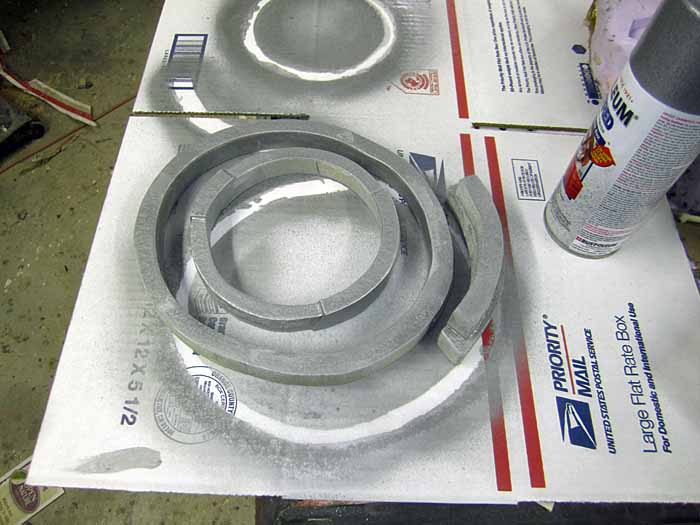
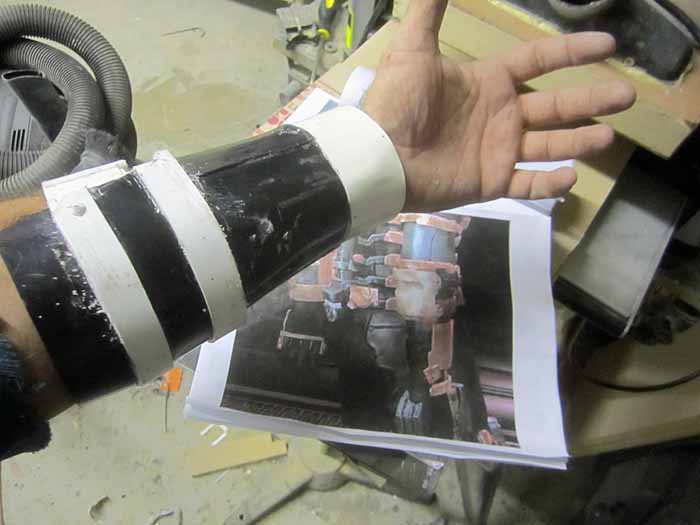
The left arm would only need the shoulder bit and the bicep band. I made these out of MDF on the bandsaw:
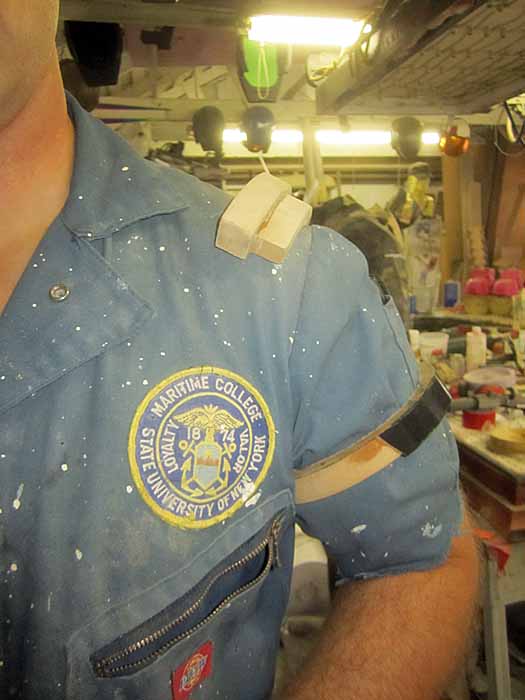
There are also rings around the thighs just above the knees, so I cut one of them from MDF as well. Here's the bicep and thigh rings as well as the left shoulder bit all painted up and ready for molding:
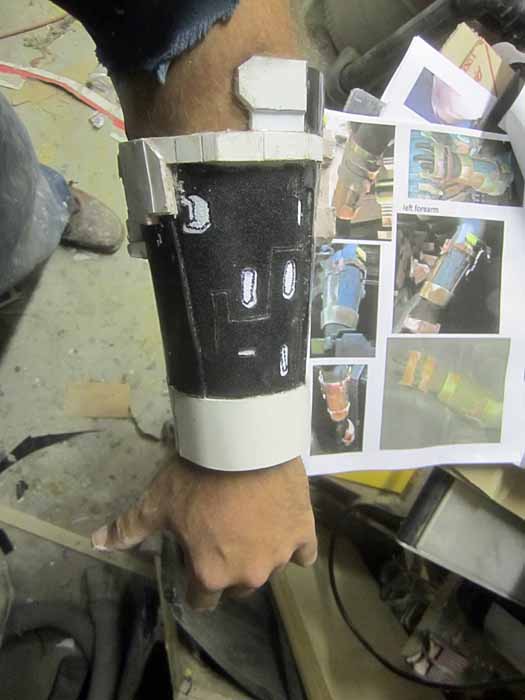
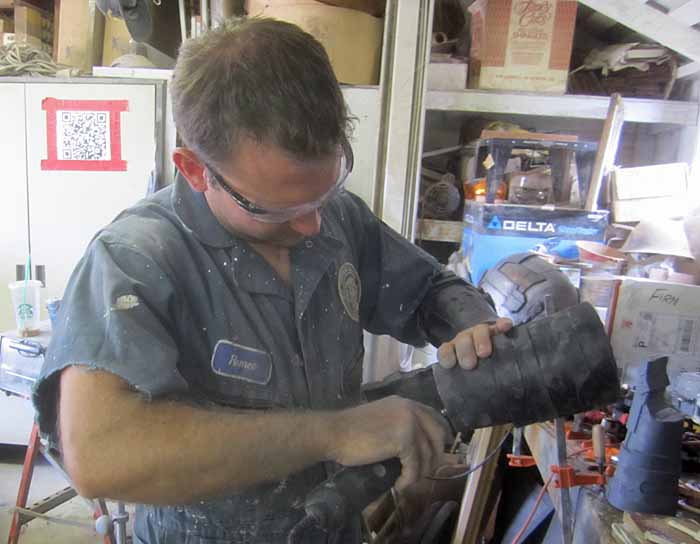
The gauntlets made for an interesting build with their overwhelming volume of details. I cobbled them together from scrap sheets of ABS and styrene I had leftover from other projects. Here's the inside of the left:
Here's the outside:
Once I was happy with the build, I gave it a coat of primer to make sure it still looked good when it was all one color:
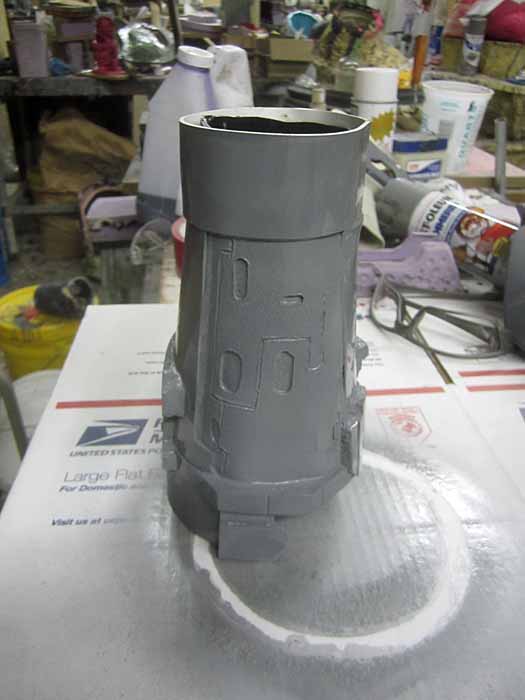
Then I capped the end and prepped it for molding:
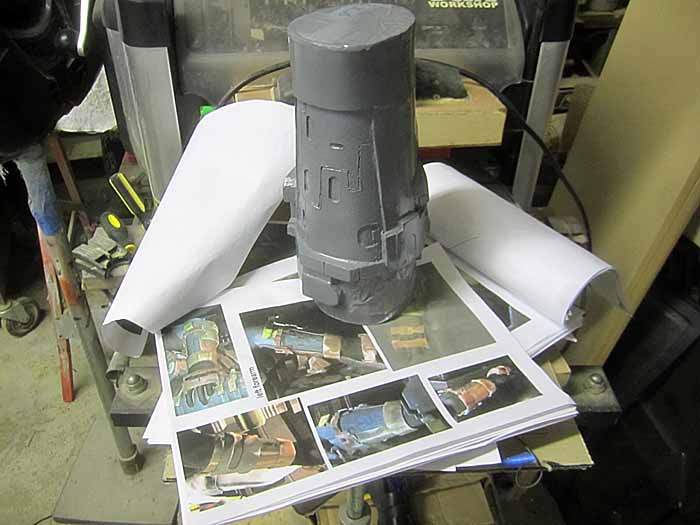
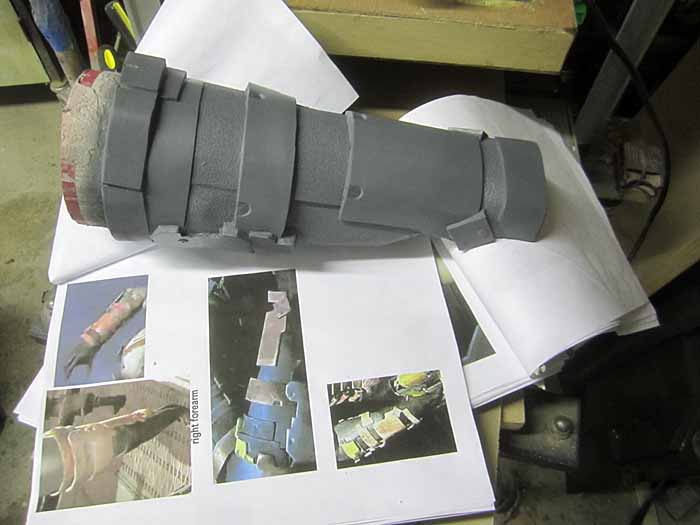
The right forearm was done the same way. Here's a shot of it prepped for molding:
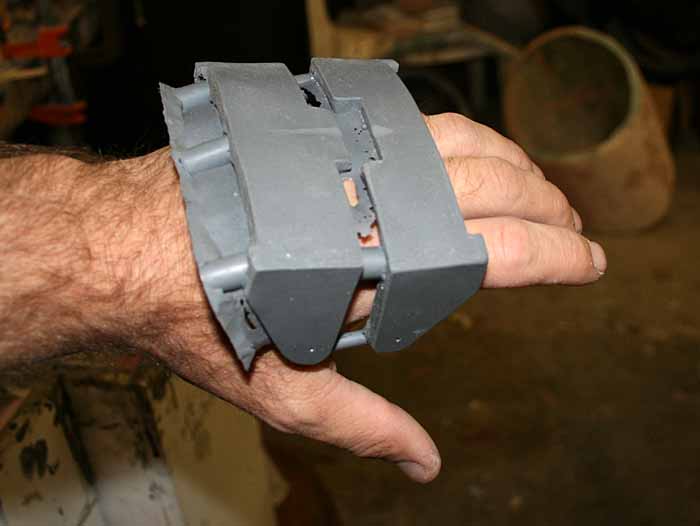
The molds for the gauntlets were simple matrix molds. Here's the one for the right gauntlet:

After rotocasting one of each, it was time to start prepping them for paint:
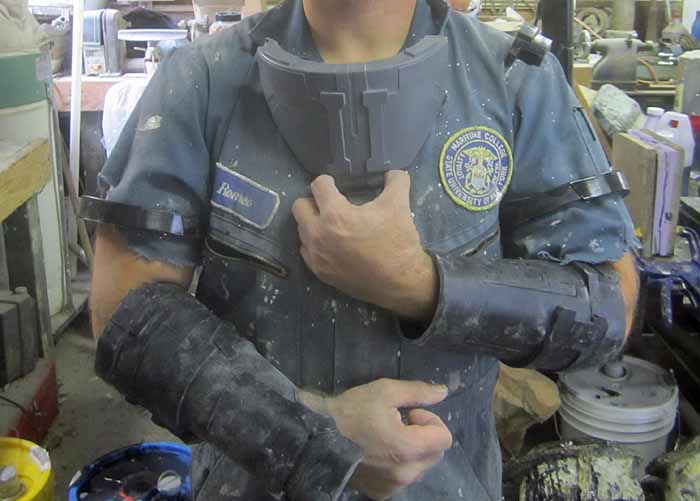
Of course, with the ends cut open I couldn't resist the urge to try them on:
Somewhere toward the end of this build, my workshop camera walked off and I didn't get pictures of the prototypes for a few parts. In that time I sculpted, molded and cast the left hand parts:
The tailbone:
The straps and greeblies for the right thigh too:
About this same time I also put together a belt buckle from MDF and bits of styrene:
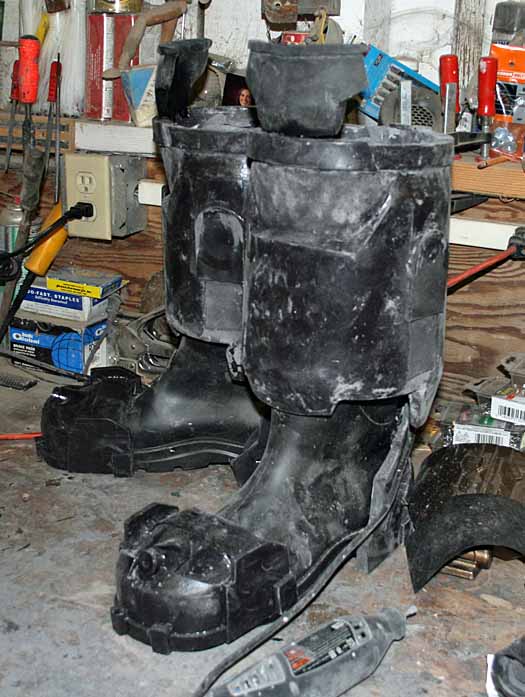
That done, I started working on the boots. It turns out that the hard parts of the boots are nearly identical from left to right. So I decided to cheat a bit and only make one set of prototypes. Here's an early shot of the shin/calf part which I'd thrown together from bits of sheet stock:
Here's the toe:
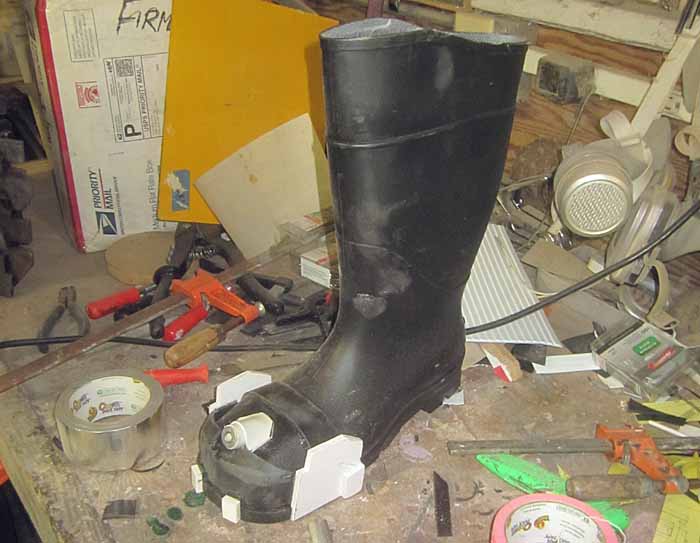
Here's all three of the pieces of the boot before the went under the rubber:
Boot molds in progress on my increasingly messy workbench:

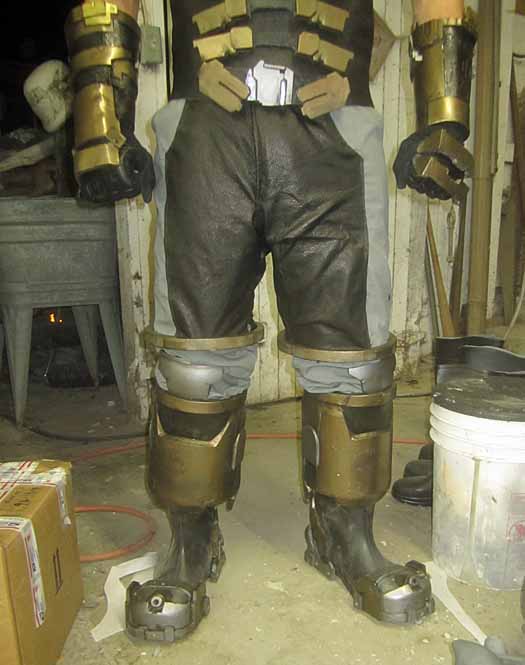
Here's the boots all stacked together before painting:
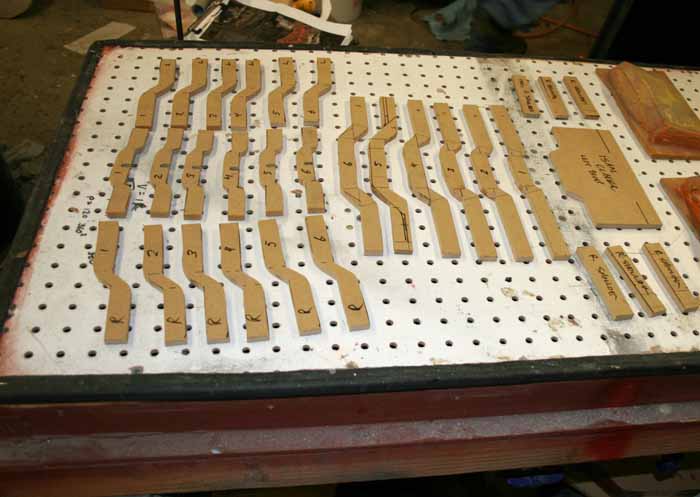
Under the bronze-looking parts on the chest there are an array of straps that seem to hold them all together. To simulate this, I made a bunch of strips of 1/4" fiberboard:
Then I laid them out on the forming table and made a pull in .040" ABS plastic:
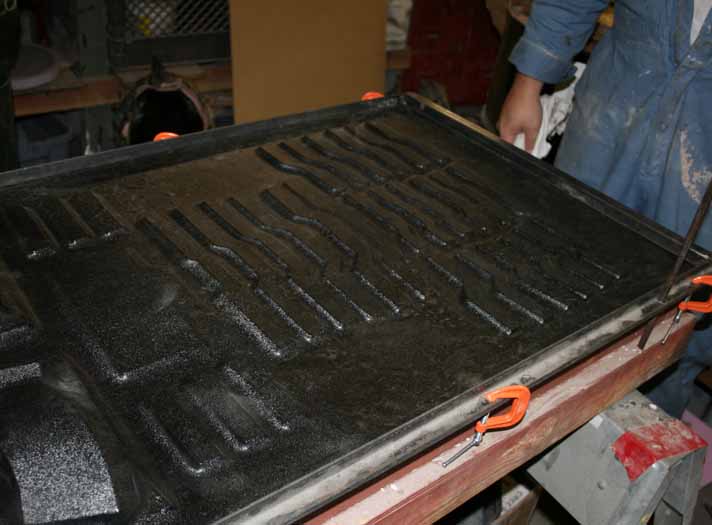
After cutting them out on the bandsaw, they really looked the part:
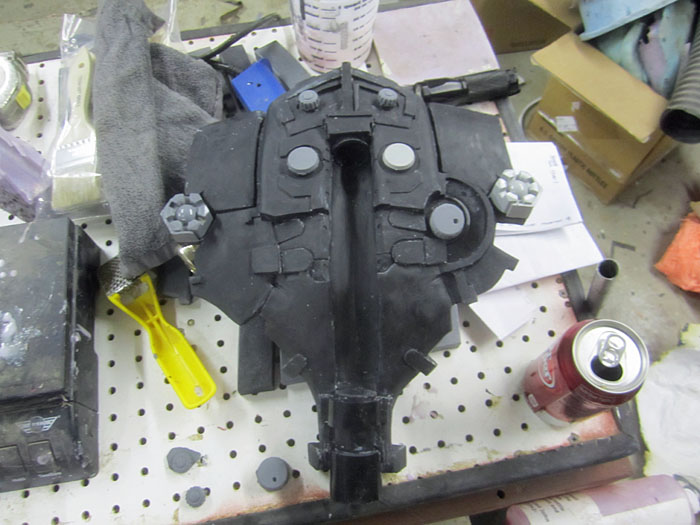
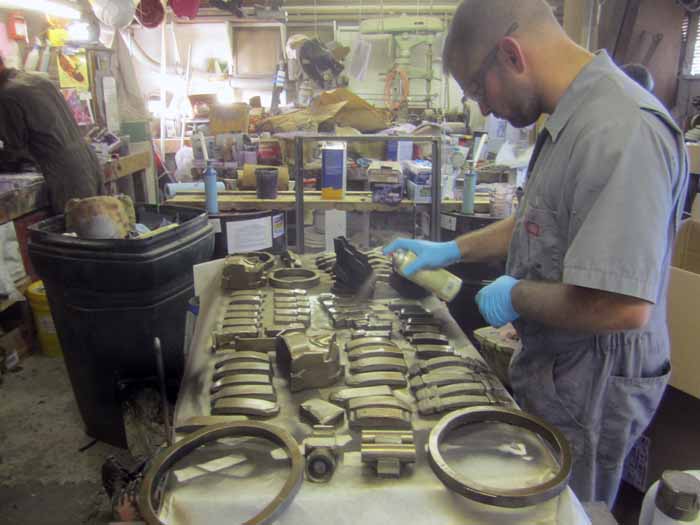
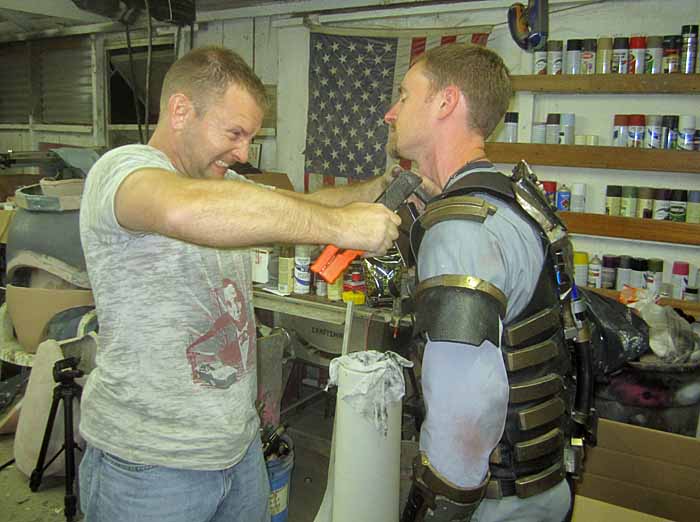
Back in the workshop, I put a coat of black primer on all of the parts:
There's a lot of parts. Once the primer had dried, I gave it all a bronze basecoat:
Just like the helmet, various parts were picked out in different shades of Model Masters Metalizers:
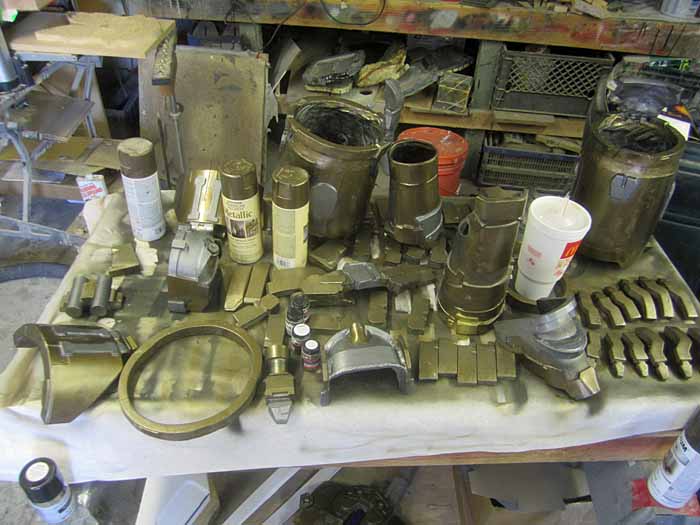
I also picked out a lot of parts in gloss black:
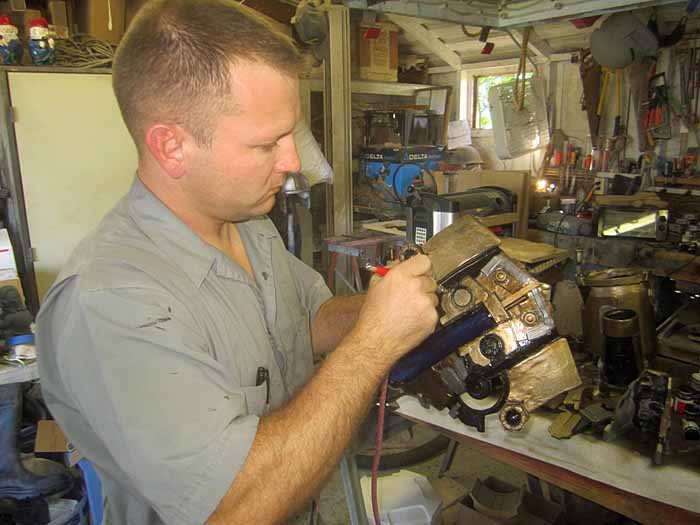
After the airbrushing was done, it was time for a blackwash to age it all:
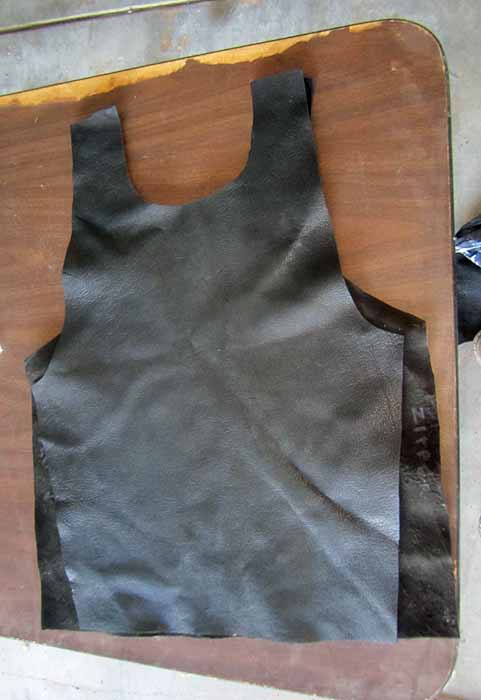
Once I'd decided on how to attach the rig parts to the chest, it was time to head over to Barta Hide in Petaluma and pick up some leather scraps and remnants. Barta has the best deals I've ever found for leather, provided you can cope with the smells while you dig through their scrap bins:

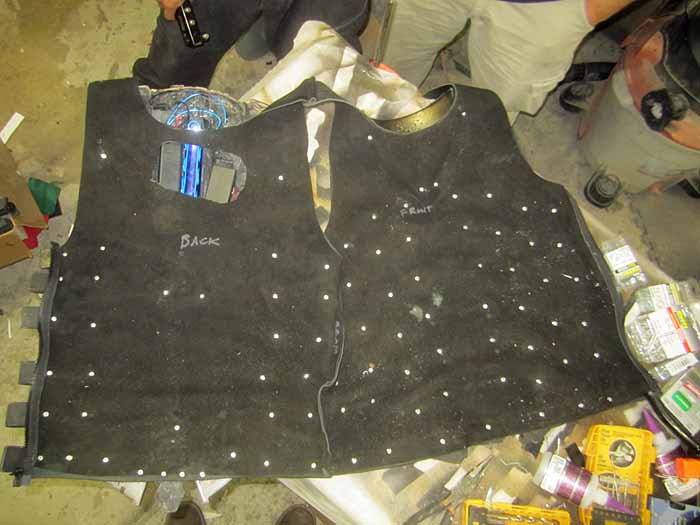
I made a quick pattern out of butcher paper and convinced my friend Breana to throw together a leather vest for me. Here's the parts cut out:
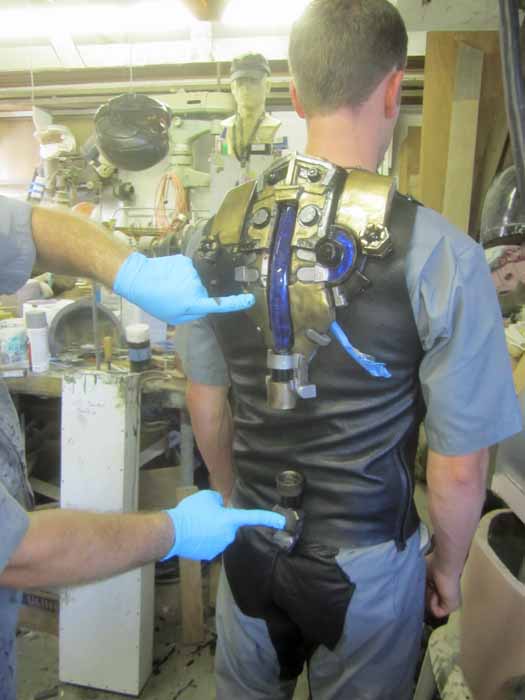
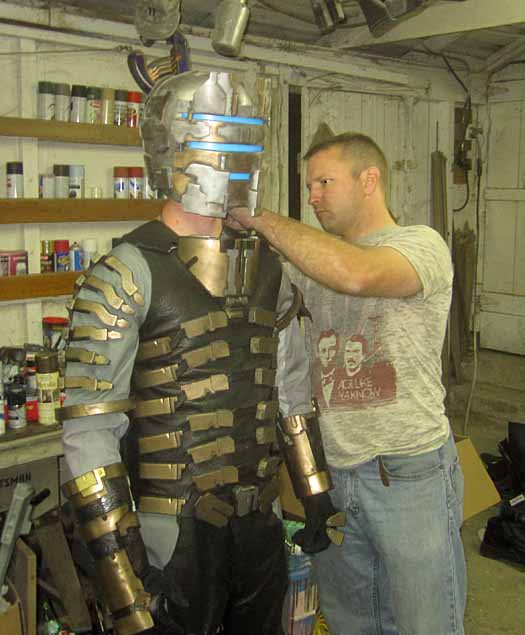
Once the vest was stitched together, it was time to lay out the hard parts:
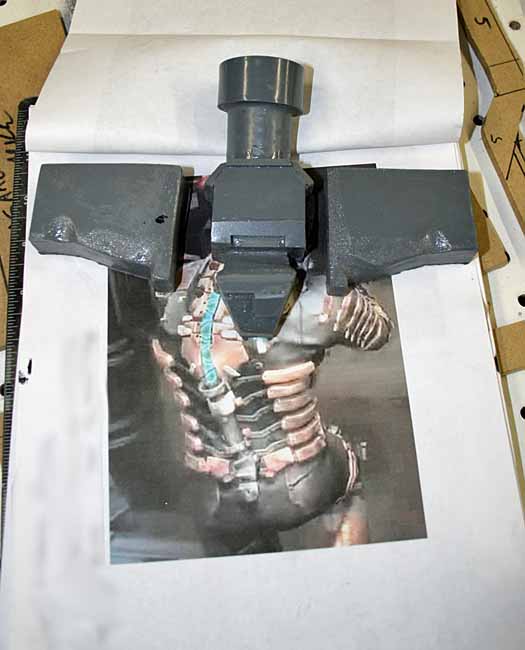
While I was tinkering with the vest, it was time to finalize the wiring. I gave my friend Matt a rough idea of how I envisioned it and handed him a couple of printed screen captures from the game and he came up with this:
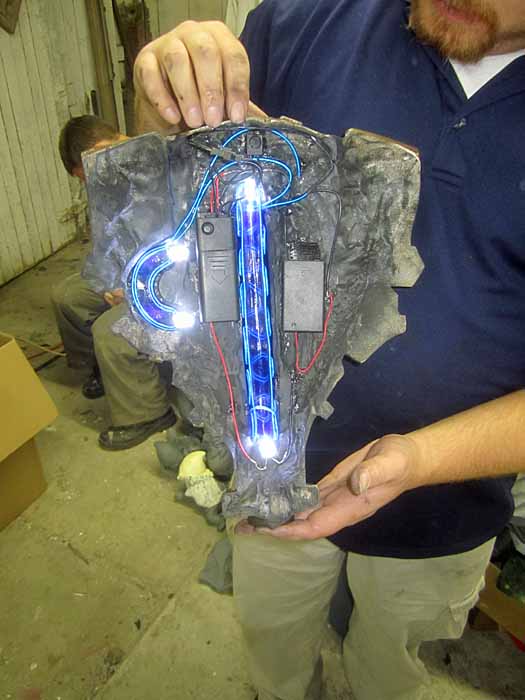
It works:
To assemble the vest, I used rivets through the leather to attach all of the straps and chunks of armor. Here's a shot of the inside:
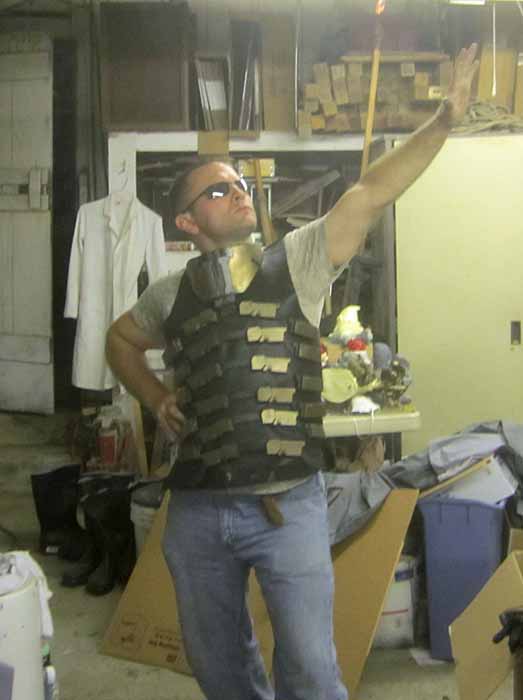
Here I am trying it on:
Here's the vest all put together:
I also had Breana add a leather seat to a pair of grey short-sleeved Dickies coveralls and riveted a few pieces of the armor onto them. Here's an early test fitting:
The test fitting was done using Trevor the walking mannequin. He's a good sport and usually manages to hold still while I poke holes in his clothing with a soldering iron and then drive in pop rivets:
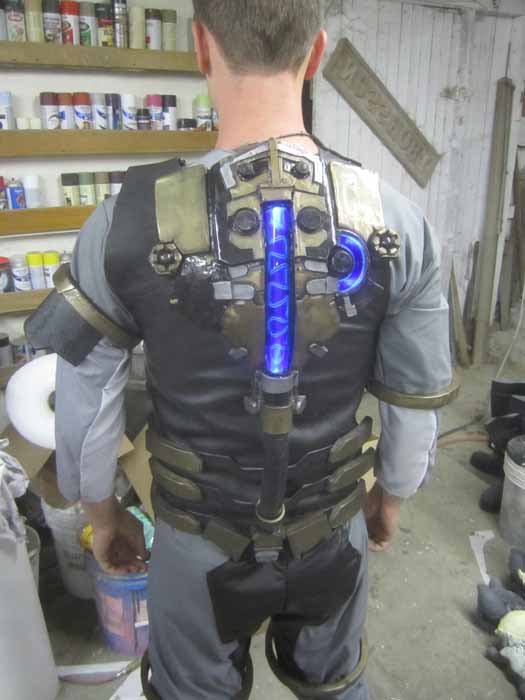
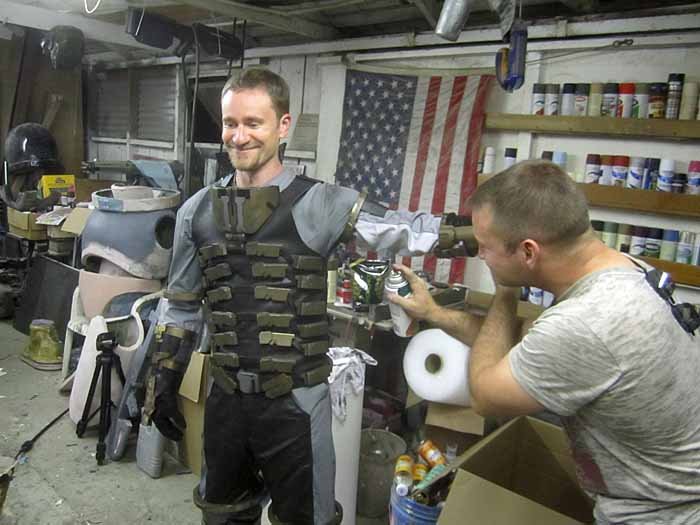
Here's another shot of the RIG coming together:
Using black and red rattlecan primer, I added some stains and weathering to the coveralls:
Some days I feel sorry for Trevor, but then I figure it's his own fault for being about my size and willing to suffer. Either way, he seems to be okay with being dressed up and abused if only because it means he gets to stand around looking like this:
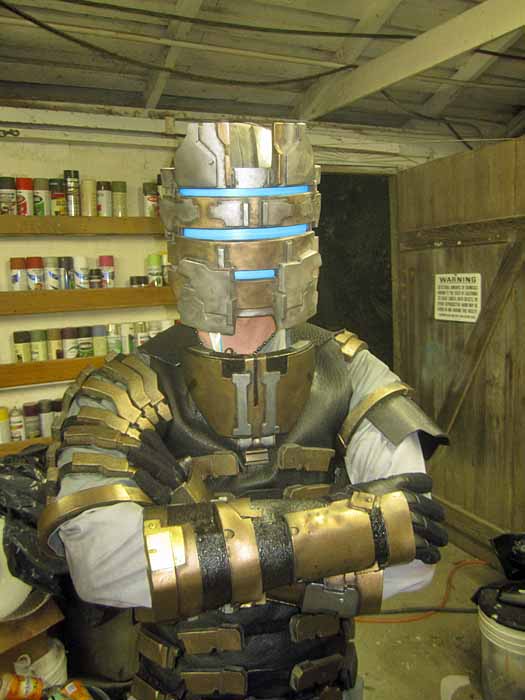
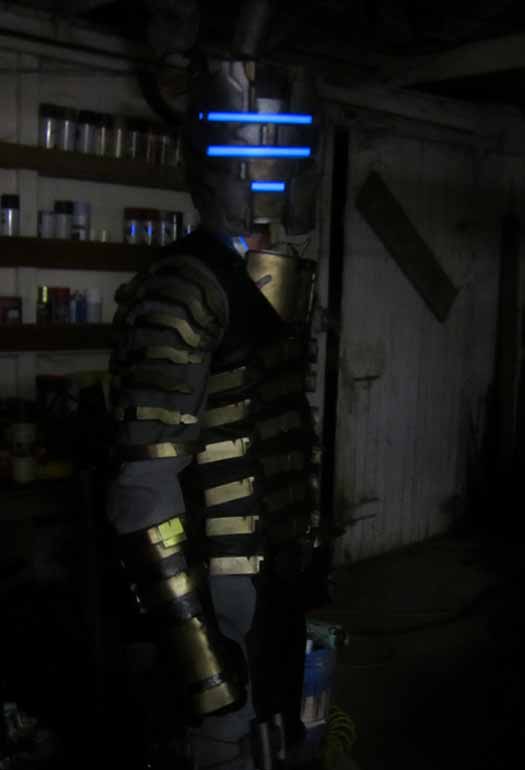
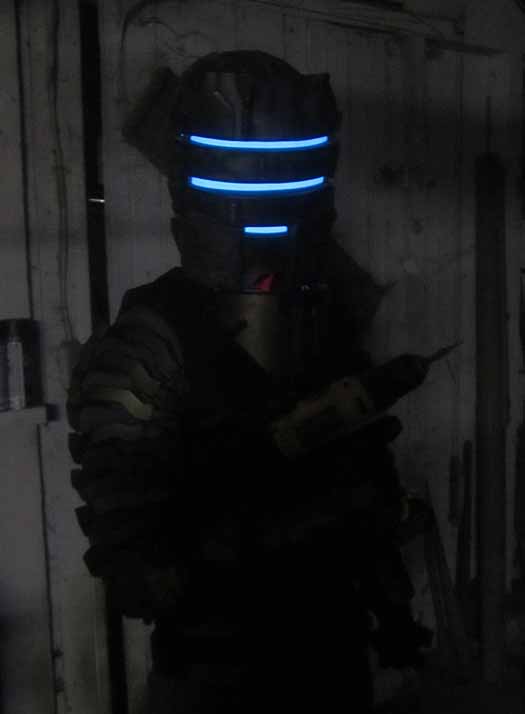
Final assembly of the RIG required 176 pop rivets, 14 wood screws, 4 zip ties, and (somehow) absolutely no bleeding. Here's some dimly-lit shots of the end result:
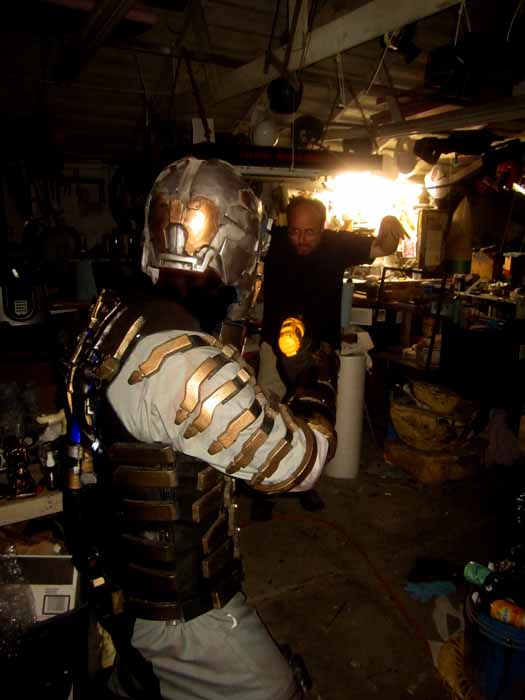
I still need to take this costume out for a location photoshoot armed with something other than a DeWalt cordless drill and throw together a more convincing Necromorph than my friend Matt:
But you get the idea.
I've got an even bigger costume project in the works right now. As always, stay tuned...
How did you get visibility in the helmet?
ReplyDeleteSHUT UP AND TAKE MY MONEY
ReplyDeleteAwesome stuff man. I've always tried to make interesting costumes for Halloween, but never anything as impressive as this stuff. Plus, it's always cool hearing about this stuff in places I live near (In RP). I should clean out the garage and start building a little workshop to do some cooler stuff, or at least mess around.
ReplyDeletethis is absolutely amazing! Well done!
ReplyDeleteAs a novice costume maker, this is inspiring. Amazing work.
ReplyDeleteExcellent work you have done there. I wonder if you can see through that helmet
ReplyDeletehttp://www.thinkgeek.com/geektoys/collectibles/e9dd/
ReplyDeleteThere. What is quite possibly the most amazing costume piece I've ever seen deserves an equally amazing prop.
Wish I had access to tools like that... I'd go a little nuts.
If only I had the patience and skill you have. Damn fine job dude
ReplyDeleteJust...awesome...
ReplyDeleteMatt is a shockingly good necromorph
ReplyDeleteThat's awesome. Any chance of a security suit?
ReplyDeleteAnon made a very good question.
ReplyDeleteI'm interested in this.
just
ReplyDeleteamazing
How much? I just threw my wallet at the screen.
ReplyDeleteshits the dank bro
ReplyDeleteYour a cool guy. At least I assume you are because you just built a bad ass costume. Props to you for your hard work and ingenuity.
ReplyDeleteSmall X-Ray machine mounted on the helmet that then feeds the acquired data to an android based phone that is then connected to a mini LCD screen inside the helmet in front of the eye viewing area. It wasn't the greatest choice but all of the other options were classified military items that I wasn't allowed to take home. Area 51 doesn't joke around anymore.
ReplyDeleteThat isn't my real name. ...Damn it... Michelle is going to be pissed
ReplyDeleteI mean.. no one is going to be pissed.. Please don't approve my comments. I am the president of the USA and this is going to fuck up my re election.
ReplyDeleteObviously he just bought this costume off the internet. jeesh.
ReplyDeleteYour a big fat pice of shit if you thank that
DeleteEasy, killer. I'm pretty sure he was being facetious.
Deletei would pay any amount of money for something like this dude, this is amazing work beyond any words can describe
ReplyDeleteI tried throwing money at the screen but nothing happened... what I need to do to get one of these???
ReplyDeletemake your own
Deleteexcelente que bueno que arta gente comparta la pasión por el dead space
ReplyDeleteThat is so pro. Excellent work! That would be an awesome Halloween costume. If there was only a Samus Aran costume with that level of detail... One can only dream.
ReplyDeletethe most epicnessnes thing iv ever seen
ReplyDeleteso badasss
ReplyDeletePlasma Cutter? with working LED Recticles. I think so. Good work!
ReplyDeleteLike a boss!
ReplyDeleteSeriously cool. Very nice first build, many people don't achieve that level without a lot of practice. Bravo!
ReplyDeleteAmazing work my friend, work in special effects and this really impressed me. If I can find the time and $ I plan on making a necromorph, though I think your friend Matt makes a good one lol
ReplyDeleteFucking Amazing!! :D i like this!
ReplyDeleteHow much would it cost you to make the advanced suit, to sell to me?
ReplyDeletethis is pure awesomeness! really impressed by your work
ReplyDeleteOh! Kudos sir, that's amazing.
ReplyDeleteDude you have a sweet setup! Nice work on the suit... Awesome.
ReplyDeleteThis is just awesome !
ReplyDeleteGroovy Man! Must help to live in a crafting studio. Where can I rent one of those?
ReplyDeleteYou are the Man, congrats.
ReplyDeleteGood job !
ReplyDeleteWOW!!!! Dude That IS FREAKIN' AWESOME!!!!
ReplyDeleteNice....cool pics man
ReplyDeleteOh my god. This is just mind-blowing.
ReplyDeleteits sooooooooooooooooooooooooooooooooooooooooooooooooooooooooooooooooooooooooooooooooooooooooooooooooooooooooooooooooooooooooooooooooooooooooooooooooooooooooooooooooooooooooooooooooooooooooooooooooooooooooooooooooooooooooooooooooooooooooooooooooooooooooooooooooooooooooooooooooooooooooooooooooooooooooooooooooooooooooooooooooooooooooooooooooooooooooooooooooooooooooooooooooooooooooooooooooooooooooooooooooooooooooooooooooooooooooooooooooooooooooooooooooooooooooooooooooooooooooooooooooooooooooooooooooooooooooooooooooooooooooooooooooooooooooooooooooooooooooooooooooooooooooooooooooooooooooooooooooooooooooooooooooooooooooooooooooooooooooooooooooooooooooooooooooooooooooooooooooooooooooooooooooooooooooooooooooooooooooooooooooooooooooooooooooooooooooooooooooooooooooooooooooooooooooooooooooooooooooooooooooooooooooooooooooooooooooooooooooooooooooooooooooooooooooooooooooooooooooooooooooooooooooooooooooooooooooooooooooooooooooooooooooooooooooooooooooooooooooooooooooooooooooooooooooooooooooooooooooooooooooooooooooooooooooooooooo........................................................................................................................................................................................................aaaaaaaaaaaaaaaaaaaaaaaaaaaaaaaaaaaaaaaaaaaaaaaaaaaaaaaaaaaaaaaaaaaaaaaaaaaaaaaaaaaaaaaaaaaaaaaaawwwwwwwwwwwwwwwwwwwwwwwwwwwwwwwwwwwwwwwwwwwwwwwwwwwwwwwwwwwwwwwwwwwwwwwwwwwwwwwwwwsssssssssssssssssssssssssssssssssssssssssssssssssssssssssssssssssssssssssssoooooooooooooooooooooooooooooooooooooooooooooooooooooooooooooooooooooooooooooooooooooooooooooooooooooooooooooooooooooooooooooooooooooooooooooommmmmmmmmmmmmmmmmmmmmmmmmmmmmmmmmmmmmmmmmmmmmmmmmmmmmmmmmmmmmmmmmmmmmmmmmmmmmmmmmmmmmmmmmmmmmmmmmmmmmmttttttttttttttttttttttttttttttttttttttttttttttttttttttttttttttttttttttttttttttttttttttttttttttttttttttttttttaaaaaaaaaaaaaaaaaaaaaaaaaaaaaaaaaaaaaaaaaaaaaaaaaaaaaaaaaaaaaaaaaaaaaaaaaaaaaaaaaaaaaaaaaaaaaaaaaaaaaaaasssssssssssssssssssssssssssssssssssssssssssssssssssssssssssssssssssssssssssssssssssssssssssssssssssssssssssssssssssssssssssssssssssssssssssssssssssssssssssssssssssssssssssssstttttttttttttttttttttttttttttttttttttttttttttttttttttttttttttttttttttttttttttttttttttttttttttttttttttttttttttttttttttttttttttttttttttttttttttttttttttttttttttttttttttttttttttttiiiiiiiiiiiiiiiiiiiiiiiiiiiiiiiiiiiiiiiiiiiiiiiiiiiiiiiiiiiiiiiiiiiiiiiiiiiiiiiiiiiiiiiiiiiiiiiiiiiiiiiiiiiiiiiiiiiiiiiiiiiiiiiiiiiiiiiiiiiiiiiiiiiiiiiiiiiiiiiiiiiiiiiiiiiiiiiiiiiiiiiiiiiiiiiiiiiiiiiiiiiiiiiiiiiiiiiiiiiiiiiiiiiiiiiiiiiiiiiiiiiiiiiiiiiiiiiiiiiiiiiiiiiiiiiiiiiiiiiiiiiiiiiiiiiiiiiiiiiiiiiiiiiiiiiiiiiiiiiiiiiiiiiiiiicccccccccccccccccccccccccccccccccccccccccccccccccccccccccccccccccccccccccccccccccccccccccccccccccccccccccccccccccccccccccccccccccccccccccccccccccccccccccccccccccccccccccccccccccccccccccccccccccccccccccccccccccccccccccccccccccccccccccccccccccccccccccccccccccccccccccccccccccccccccccccccccccccccccccccccccccccccccccccccccccccccccccccccccccccccccccccccc!!!!!!!!!!!!!!!!!!!!!!!!!!!!!!!!!!!!!!!!!!!!!!!!!!!!!!!!!!!!!!!!!!!!!!!!!!!!!!!!!!!!!!!!!!!!!!!!!!!!!!!!!!!!!!!!!!!!!!!!!!!!!!!!!!!!!!!!!!!!!!!!!!!!!!!!!!!!!!!!!!!
ReplyDeleteHolycrap, you are my costuming hero. D: I wish I could make things this amazing!
ReplyDeleteIf I saw someone in that costume in a corridor with a Plasma Cutter I would bow down and worship the great Isaac Clarke :) Fucking great job dude! You rock.
ReplyDeleteAnother awesome costume! I don't know how you have the time! Great Job as always! 130MB ;)
ReplyDeletePromote this as a halloween costume man it would be a great idea! DO IT!
ReplyDeletePromoting this is a great idea i'm sure that alot of people would love to be a badass for a day. Man great work on it to. i say its dead on accurate. :D
ReplyDeleteGuys that's really awesome. You should build a statue too. Respect.
ReplyDeleteNECROMORPHS BEWARE OF MY CORDLESS DRILL BWAHAHAHAHA
ReplyDeletehey hey hey!!! can you help? im going to make an isaac costume as well and i need some pointers
ReplyDeleteHow much my friend??? Im very interested!!!! Im from tapachula chiapas mexico... You are the best...... Congratulations!!!
ReplyDeleteThis is my mail. Asgard_josel@hotmail.com
That's so AWESOME!
ReplyDeleteKick ass!
ReplyDeleteI WILL GIVE YOU THIS MANY MONEYS!!!!!!!
ReplyDeleteI'm throwing my money at the screen, why is nothing happening?!
ReplyDeletecrazy guys!!!!:))))) nice job!!!
ReplyDeletehuh?how?wha? freakin awsome dude
ReplyDeletelol, you are such a freak just like myself. I am working on dead space suite lately too. but in a different way.
ReplyDeletehttp://louiezzz.deviantart.com/#/d4s65qr
Dude you are great im thinking of following your steps and making one dead space costume for this halloween, but i will just exchange the metal and steel or whatever u used with some cardboard and then paper mache it (i hope it survives the weather LOL
ReplyDelete)
Sooo... how much are you charging? ;)
ReplyDeleteDude... I love you. This is the most impressive Isaac Clarke I have EVER seen. I would want to buy it from you, but I'm guessing that you wouldn't be interested in selling it. Oh well, hope you have fun with it.
ReplyDeleteim trying to make the advanced suit from DS2 but, im having trouble finding good pics to base it off of
ReplyDeleteAmazing job mate! Even when you claim that the last photo is a bit cheesy, actually that backlight looks like an explotion if you look at it quickly and adds a good effect. I mean, the angle of the camera, the messy shop, dark environment and the light in the back almost makes it look like a shot from the game.
ReplyDeletehttp://www.thinkgeek.com/product/e9dd/?srp=1 if you can afford this.... well, it's a little better than a drill. and you could use a cardbox with a picture of a necromorph....
ReplyDeleteawesome.... what's your RIG number?
Stop here is my paycheck take my soical security take anyting!!!! Oh and quit your job and d this for a living!!!!
ReplyDeleteHOW MUCH DO YOU WANT?
ReplyDeleteHere's all my money and the little bit of my soul that hasn't died yet.
ReplyDeleteHow much did that cost, how long would it take to make a copy? Please email me with info, my email is: Armorines@live.com
ReplyDeleteIf you have the time. The reason why I'm askin is if so that you could make the riot security version, could the clear plastic visor be replace with eye protection plastic? And I would like to thank you for the time if you do email me, if not, oh well, it looks wicked and I can't find any Dead Space outfits that aren't the cheesy clothing type anywhere.
I've posted it before, but if there's something you'd like me to make for you, please feel free to send me an email at sthorsson99@yahoo.com so we can discuss it.
DeleteHow much? $$$$$$$$$$$$$
ReplyDeletei wish you can make me one, how mcuh?
ReplyDeleteI need a Celebrity Suits as it is my wedding in next month.
ReplyDeleteYou should do the Level 3 Engineer R.I.G. (my personal favorite) from DS1
ReplyDelete